Sliced Invoices + Formidable Forms Extension – Documentation
The Formidable Forms Extension for Sliced Invoices allows you to generate quotes/invoices based on form submissions.
Basic Setup
When editing your form in Formidable Forms, you can find all settings necessary for Sliced Invoices on the “Settings” tab, under the section titled “Sliced Invoices”. Here is where you choose whether to turn the form submission into a Quote or Invoice, map your form fields to the quote/invoice, and a few other options.
To begin, you simply need to create a form that contains the following fields:
- Client Name
- Client Email
- Business Name
- Address
- Work Required (brief description) – this becomes the Quote title
- Work Required (detailed description) – this becomes the Quote description
You can name the fields anything you like. The only required fields are Client Name, Client Email, Title, and Line Items — as long as you map something to each of these, it will work. If the email address that the client fills in is not already linked to a client, the plugin will automatically create a new client with this email.
There are several other fields available, and you can even do quite advanced things like conditional logic, dynamic populated fields, setup confirmations and notifications, and so on within Formidable Forms itself. As these are features of Formidable Forms they are beyond the scope of this document — we will focus just on the settings specific to Sliced Invoices.
Once the form is saved, you simply need to add the form shortcode to one of your pages as you would normally do. When a client fills in the form, a new quote (or invoice) will automatically be created with all the details added according to your mapping.
How to Setup Line Items — An Example
A line item requires 3 pieces of information: quantity, title, and amount. A 4th field, description, is optional. You can add 1 or many line items. To accommodate this, we use the “repeater” field in Formidable Forms.
What if you don’t want to make your customer fill in all these fields? A common request we hear is how to give your customer pre-defined options to choose from, and have the line items filled in automatically. This is easy to do with Formidable Forms — here is an example of the steps you can follow:
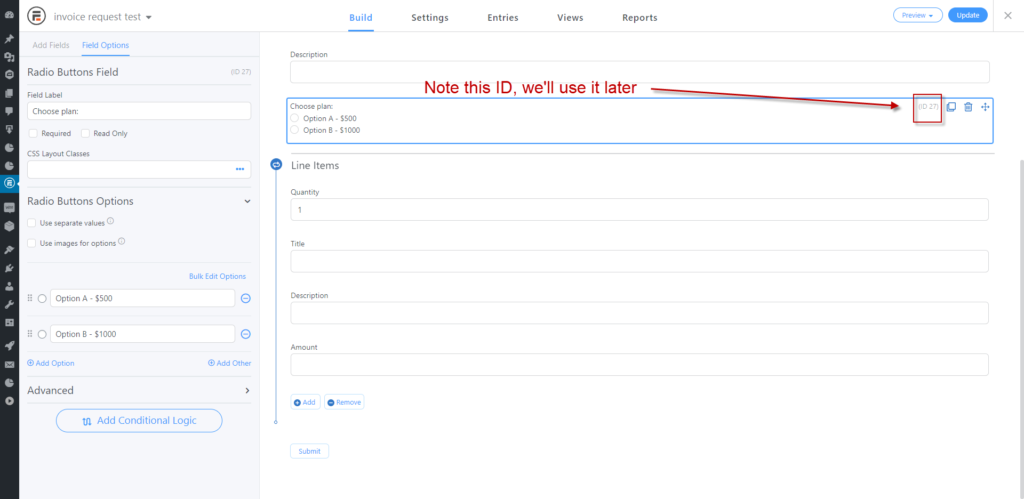
Step 1) let’s say we’re creating a form called “invoice request”. It already contains the required fields Client Name, Client Email, and Title. For Line Items we want to give the customer a choice of just 2 options — Option A and Option B. We create (in this example) a Radio Buttons Field like so (click image to enlarge):
Make a note of the field’s ID number, as we’ll be using this again soon. In this example, our ID number is 27.
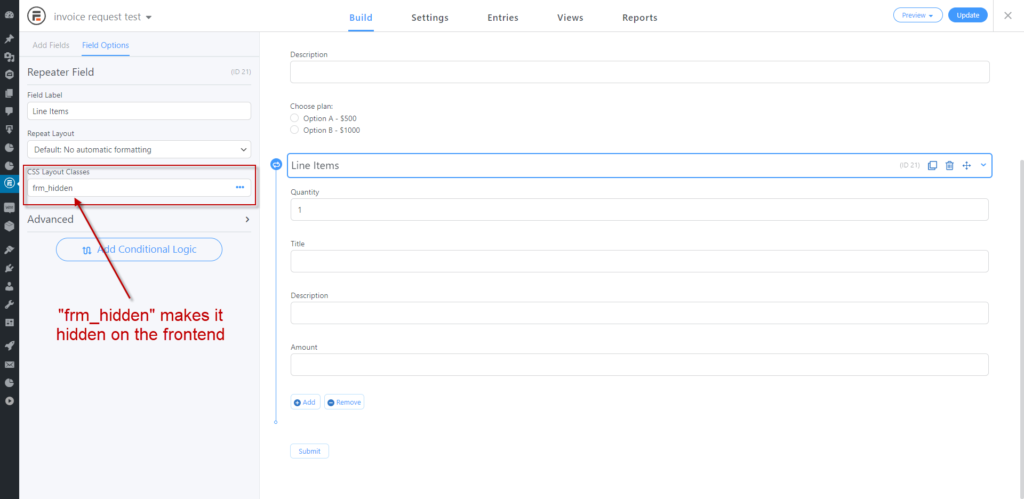
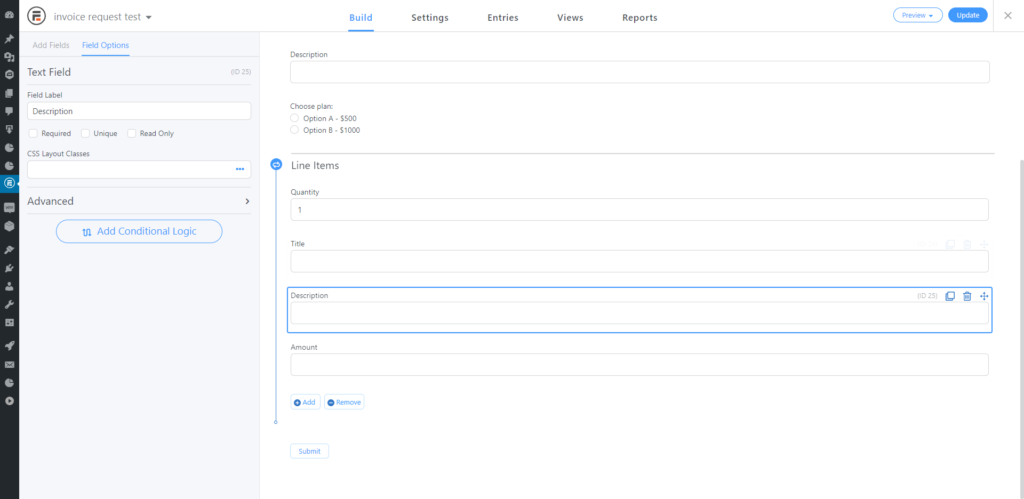
Step 2) Create a Repeater Field. We’ll call it “Line Items”. Also we’ll put the CSS class “frm_hidden” in the CSS Layout Classes box, so this will be hidden on the frontend. (We only need these fields to handle our mapping.)
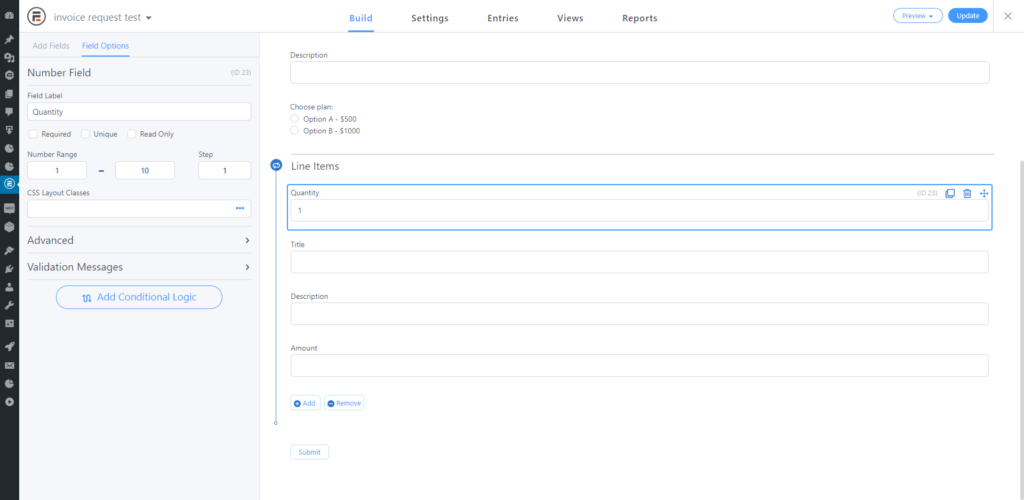
Steo 3) add a Number Field for Quantity. For this example, we’ll enter a default value of 1.
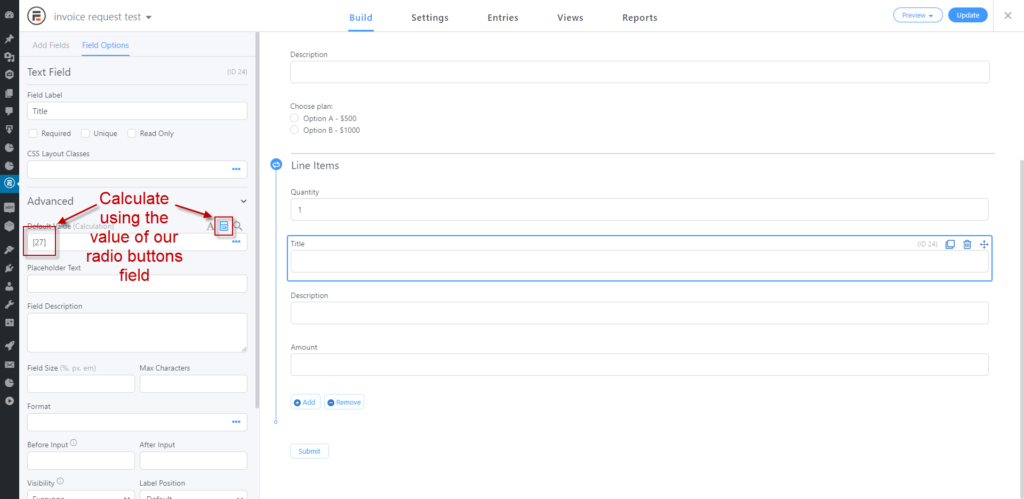
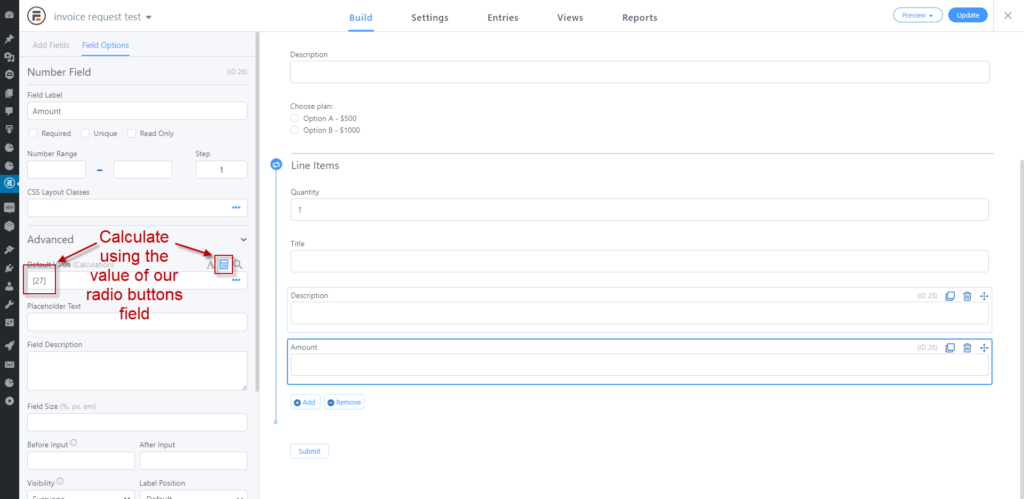
Step 4) add a Text Field for Title. We’ll have the value of this one calculated dynamically based on which radio button the user selects. To do this, click the calculator icon, and enter Default Value as the ID number from Step 1, in brackets. In our example, we enter [27]:
Step 5) the Description is optional, but if you want one, you can add it as a Text Field, like this:
Step 6) add a Number Field for Amount. Again we’ll have the value calculated dynamically based on which radio button the user selects. Click the calculator icon, and enter Default Value as the ID number from Step 1, in brackets. In our example, we enter [27]:
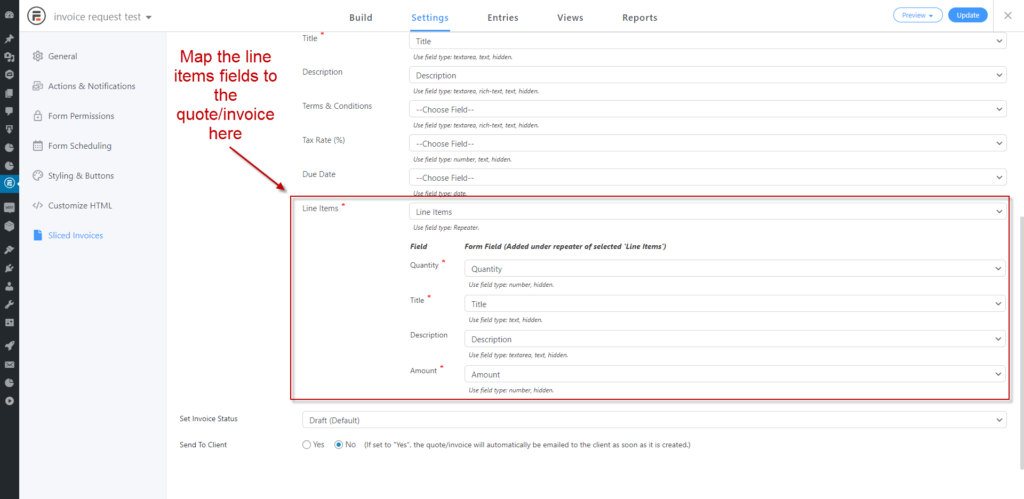
Step 7) now that we’ve added all our fields to the form, we go to the Settings tab, and click on the Sliced Invoices section. Here we map the Line Items fields to what we just created:
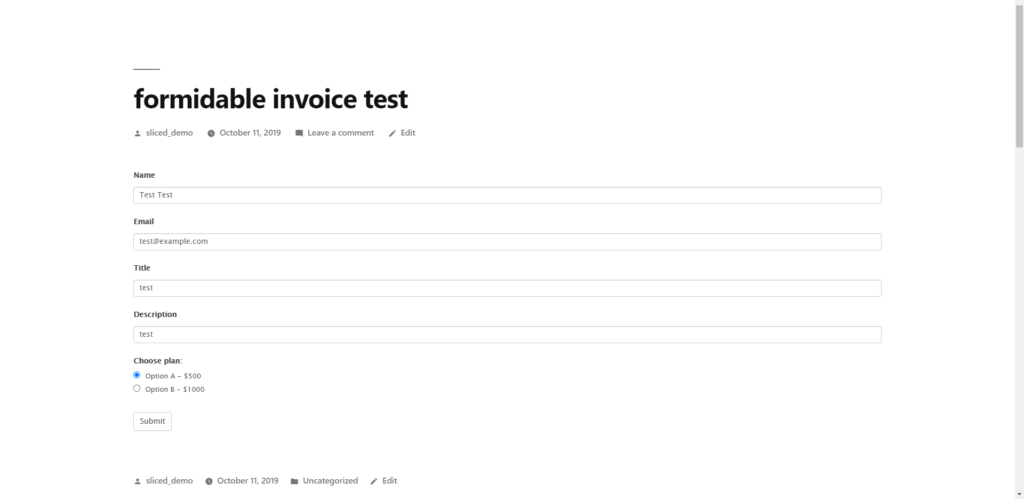
That’s it! Our form should now look something like this on the frontend:
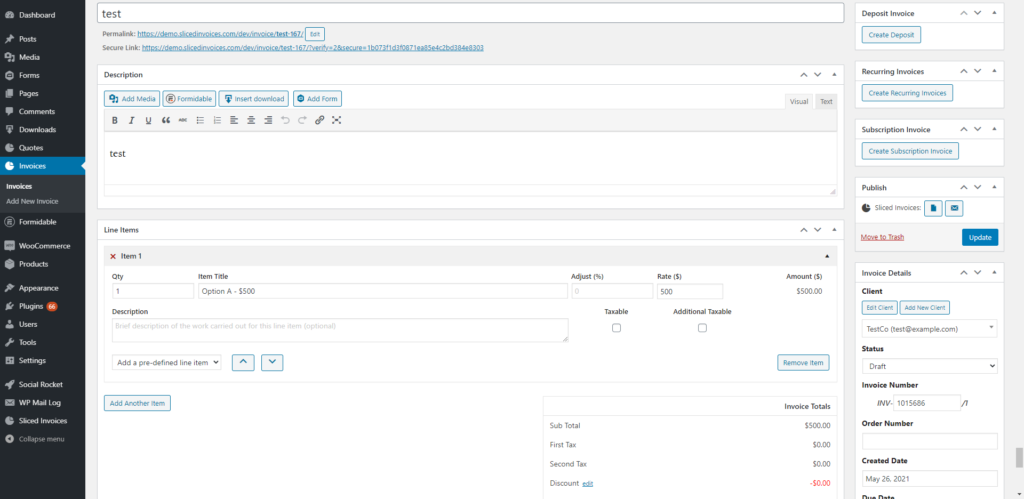
… and when a customer submits it, an invoice will be created like this:
If you need further help with Formidable Forms, we recommend checking their Documentation Site as it provides a lot of useful information. Or, if you need help with Sliced Invoices-specific features, let us know by opening a Support Ticket.

