Partial Payments Extension Setup Instructions
Configuring the Partial Payments Extension is simple and only requires a few steps.
First, install the extension just like any other plugin. If you’re not familiar with installing WordPress plugins, we have a tutorial here.
Once installed, go to Sliced Invoices -> Licenses. Enter your license key, save it, and activate it.
Partial Payment Settings Box
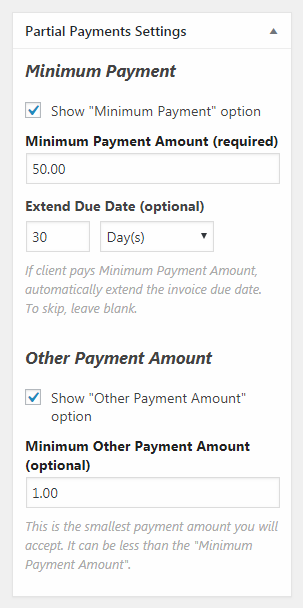
Partial Payments adds a new box on the quote/invoice editing pages. To enable partial payments for an invoice, simply enter the necessary settings here.
If you enter partial payments settings for a quote, they will automatically be transferred to any future invoice once the quote is accepted.

- Show “Minimum Payment” option
Check this to enable the “Minimum Payment” button at checkout. - Minimum Payment Amount (required)
Enter the amount of the minimum payment here. This field is required — the “minimum payment” option won’t be shown unless you specify the amount. - Extend Due Date (optional)
If the client pays the minimum payment, automatically extend the invoice due date. This field is optional — if you leave it blank, the due date will not be changed. - Show “Other Payment Amount” option
Check this to enable the “Other Payment Amount” field at checkout. This allows the customer to choose their own payment amount. - Minimum Other Payment Amount (optional)
This is the smallest payment amount you will accept. This field is optional — if you leave it blank, any payment greater than 0 will be accepted. However it’s recommended you specify a small amount just enough to cover any per-transaction fees your payment processor may charge, for example $1.00 (or €1,00).
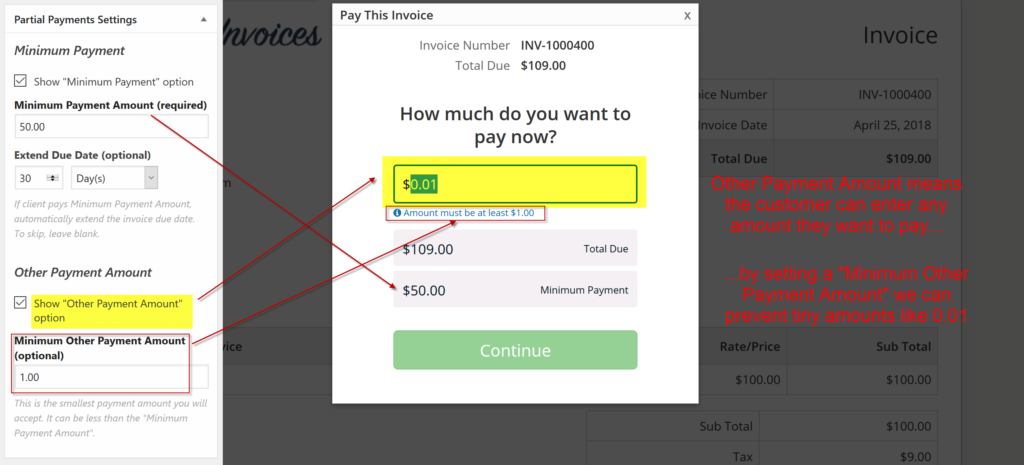
Note: if you have enabled both the minimum payment and other payment options, any other payment amounts equal to or greater than the minimum payment will also extend the due date, if applicable.
The following graphic explains how each setting looks to the client:
Still need help?
Simply open a support ticket here.

