2Checkout Payment Gateway
2Checkout Payment Gateway Setup Instructions
Configuring the 2Checkout Payment Gateway is simple and only requires a few steps.
First, install the extension just like any other plugin.
Once installed, go to Sliced Invoices -> Payment Settings
Enter your Account Number, Secret Word (both are required). If using the “on-site” checkout type, you must also enter your Publishable API Key and Private API Key. These can be found by logging in to your 2Checkout Account, under the API section.
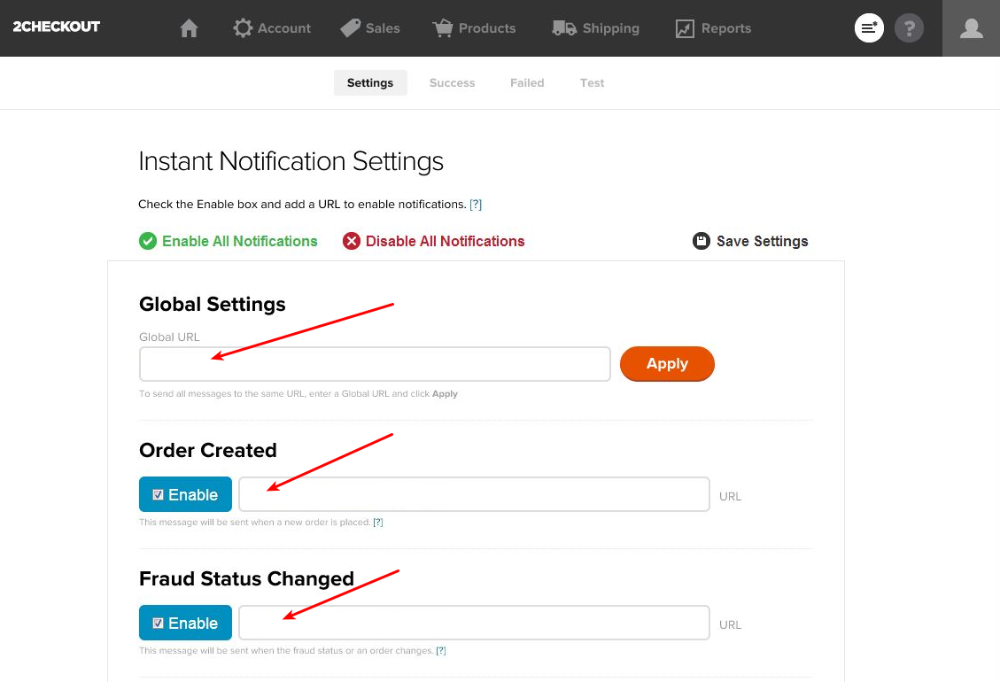
Instant Notification Service (INS)
2Checkout’s Instant Notification Service allows 2Checkout to communicate with your store, keeping transaction data in sync. INS should be setup as follows for best results.
From your 2Checkout account, navigate to the Notifications screen and enable all notifications. The URL should be set to:
http://example.com/payment/
Note: please replace “example.com” with the appropriate name of your website.
Troubleshooting
INS Failures
If you find that your INS requests are failing, make sure that you’re using the same protocol for all requests. For example, if you make your request via HTTP, but then require HTTPS for incoming requests (from 2Checkout for example) then they’ll fail, since they don’t match.
Error: Unauthorized
This notice can happen when the billing address is not filled out. The billing address is required, so hiding or removing it will cause the transaction to fail.
Bad request – parameter error
If you receive this error, it means one of two things:
1. Your 2Checkout account has not been fully approved. Contact 2Checkout’s support team to confirm and to fully activate your account.
2. Not all required fields are being sent to 2Checkout. This could happen if you have removed the billing address or other required fields on the checkout form. To resolve the problem, restore the fields that were removed.